VNC Connect for Mirroring Direct to Student Tablet
We see it in almost every classroom we have stepped foot in… Some sort of projection setup where classroom content is being projected to some sort of large surface in order for the whole class to see. But what about students who have a visual impairment? These setups often prove to be extremely difficult when it comes to being able to fully access projected class materials and major content areas. But, what if there was a way to magically beam the projected content right onto a tablet that the student could have, right at his or her own desk that could also enlarge in real time?
We are going to explore such a setup using the Real VNC program and app. Before we get to the nitty gritty, let’s first understand this setup so we can tell exactly what classroom setups this would work for.
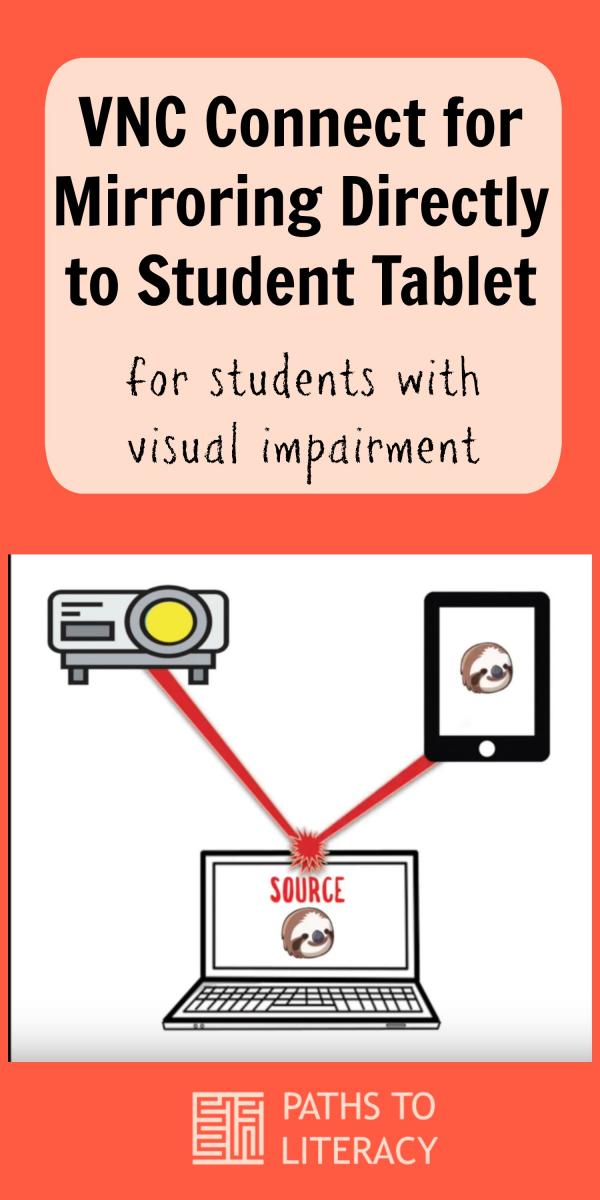
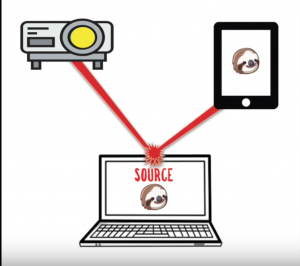
Classroom Teacher's Computer
Let’s start with the classroom teacher’s computer.
This is really the most important part of the system, as it is the main SOURCE! Most classroom projectors run directly off the classroom teacher’s computer. So, our goal would be to wirelessly mirror that content from the classroom teacher’s computer directly to the student’s tablet. The student tablet and classroom projector really have nothing to do with each other in this setup.
Now that we have a basic understanding let’s get to gettin.
Using Real VNC to Mirror to Student's Tablet
We are going to use Real VNC to accomplish this mirroring. So, let’s go to www.realvnc.com.
- Once there we need to click on SIGN in which is located visually on the upper right corner of the screen. This is where we can start to make an account for the student which is very important. Once the account is made the student can manage up to 5 computers that can be mirrored directly to the tablet.
- Next the students email and a password are required. As always please write down or choose an easily remembered password.
- Enter some basic info and make sure to choose “PERSONAL” for account type. And sign in.
- Next choose a home account.
- You will see some more options and info to fill out but you can skip all that and click on: “Get remote access without contributing.” Click continue and VNC will send a verification to the entered email address.
- Now let’s jump on the computer we wish to mirror to student device. Now simply type: “V N C Server” in your favorite search engine and it should pop right up.
- Once installed it will ask for your account info. Hopefully you remembered it…
- It will also ask you to create a specific V N C password. This will be the password the student will use the 1st time they ask to connect. Next it will ask you to name the computer, PRO TIP: give it a simple teacher name or room number to make it that much easier on the student.
Settings on VNC Connect
ALL Right! VNC Connect is already to go, but before we start beaming all over the place, let’s go over some helpful settings. Depending on each specific case there might need to be different tweaks when it comes to settings.
- So, let’s first go to options. Now go to Users and Permission and click on global permissions. I would first make sure all these boxes are unchecked. This will take away all abilities for student to access or click on content for mirrored desktop. This way they will only have access to the image.
- Now go to connections down to the 2nd and 3rd check boxes. These will ask to: show a pop up on source computer that the teacher will simply need to click on in order for a connection to be made. In some classes where an aide is solely in charge of the initial log in process we will allow the device to connect without the pop up but in most cases, we use this feature.
- This is what it looks like on the teachers end.
- Another good feature to have on is under privacy to make sure you are notified when any user is or is not connected.
Now let’s go to the student’s device.
- Simply download the V N C Viewer app onto the device. Open and enter your account info. You will have to verify at this point. Next you will have to input that V N C password and make sure you click on “Remember Password” so the student won’t ever have to enter again.
And there you have it! Now after all that painful setup is done the student could simply click on up to 5 different computers and have direct access.
Accessing Live Projection
A final part to this system would be access to live projection. So, here’s the final piece of the puzzle. MOST projectors have free software that allows a projector to show the live feed on to a computer. So by simply finding the right chord and program, the student will have total access from this setup! We have done this with Elmo’s, Ladybugs and a few other brands.
Well that’s it, I hope you enjoyed and I hope I didn’t project too much on you all. Thanks