Tactile Flower: Making a Bridge to Tactile Images
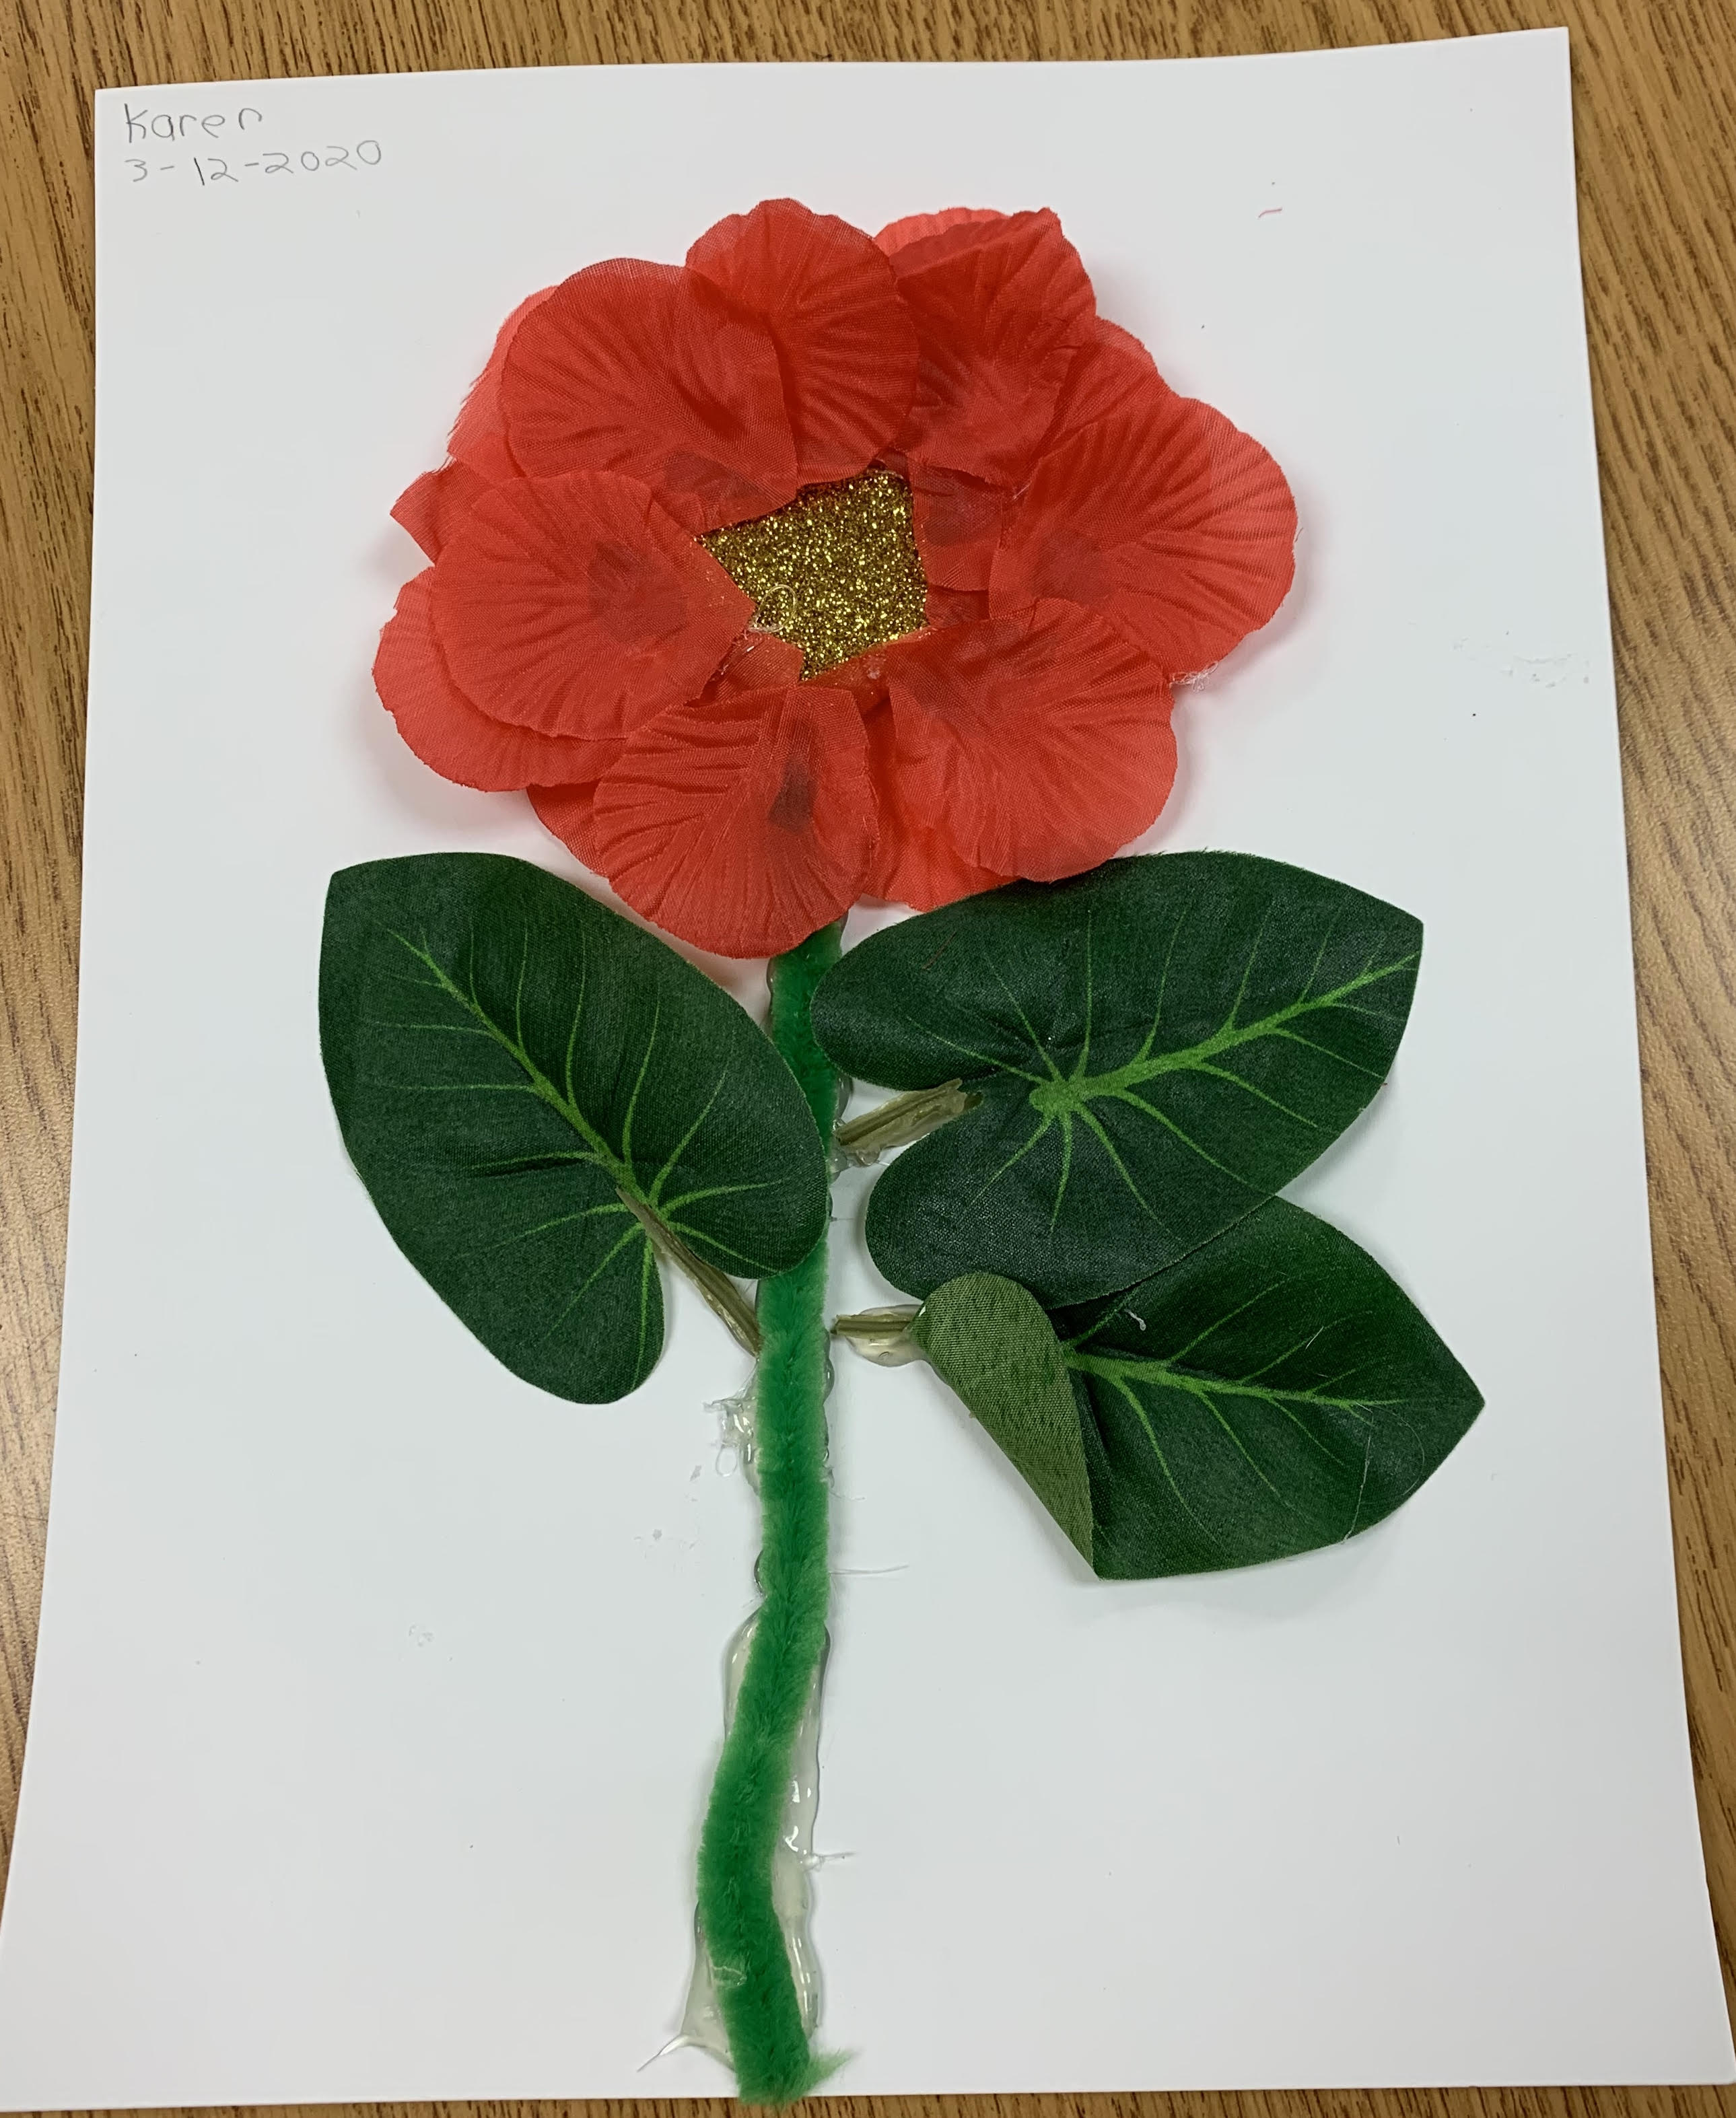
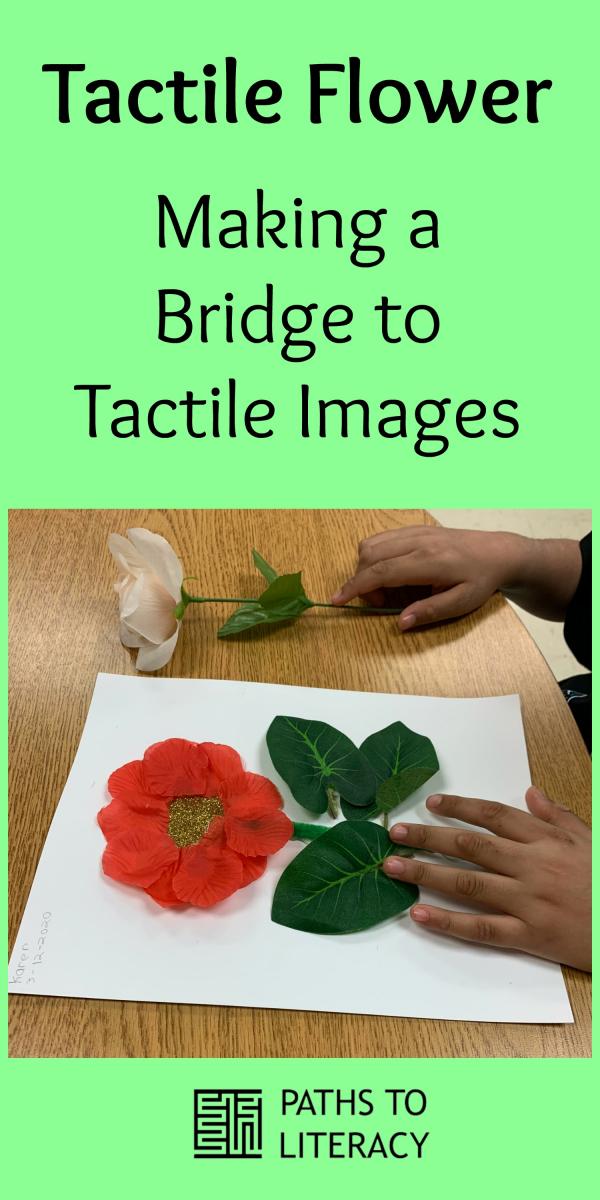
In order to help my students understand tactile images, I like to invite them to explore an object and then attempt to recreate it. By exploring each of the parts individually, it's easier for them to understand how they make up the whole.
We started off by exploring real flowers, and then in this lesson they examined an artificial flower. We discussed the parts of the flower (petals, stem, leaves) and how they fit together (e.g. the stem is at the bottom, the leaves come out of the stem).

Then we looked through the available materials to determine what was needed. I bought the flower petals from Oriental Trading, where they have lots of color choices to choose from.

The student first laid out the parts of the flower, to arrange them to match the model.


We hot glued each part of the flower onto the paper, starting with the stem. This was a slow process, as we had to wait for 5 minutes for it to cool before touching the page again.