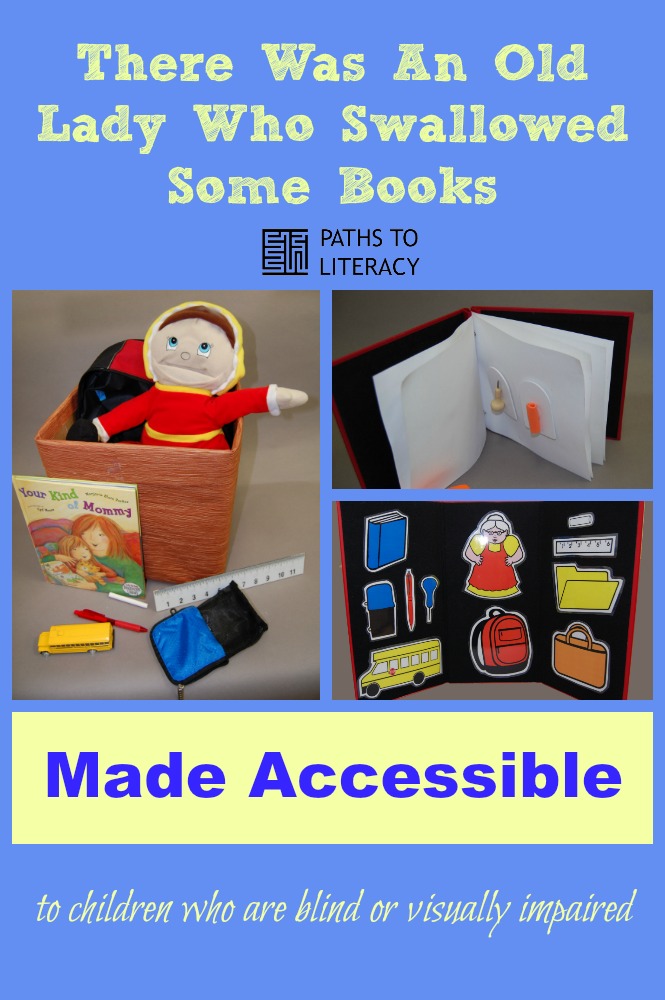
Making "There Was an Old Lady" Accessible
- Story Box
- Picture Communication Symbols for Story Box
- Tactile Communication Symbols
- Talking Book Project
Story Box

My story box brings to life There Was an Old Lady Who Swallowed Some Books! by Lucille Colandro, illustrated by Jared Lee. Rather than choosing the tiny objects designed to fit into the old lady's mouth, I chose real items so as better to convey their meanings to children who are blind or visually impaired. However, a couple of objects can be placed in her mouth for fun. I selected all items named in the book, and added a stylus to go along with the pen in order to show that children who are blind or sighted all write, just in different ways. To convey this same message about reading, I chose both a book and a ruler containing print and braille.
Background Knowledge
For background knowledge, I would make sure everyone understood that this is a crazy make-believe story and that people don't go around swallowing things that aren't food. I would show them that a ruler is used to measure things and demonstrate this by helping them measure the length of each other's arms and some objects they like. Then to make the size of a school bus real to them, we would go outside and first walk the length of a car to see how far we got into the song "The Wheels on the Bus." Next, we would see how much farther we got in that song while walking the length of a school bus!
Activities
For our activities, I would first read the story aloud, showing the child each object as it is mentioned. Then I would reread the story, asking the child to group the objects together to show their relationship, such as putting the pen on the book, then inside the pencil case, then placing the ruler next to the pencil case and so on through the end. We would first do this together, then I would see how many the child could do on their own.
We would discuss the concept of "inside," while seeing that the pen goes inside the pencil case, the ruler goes inside the folder, the chalk goes inside the bag, and that everything besides the school bus goes inside the backpack. I would let the child practice placing items inside one another to reinforce the concept and help with manual dexterity (and hopefully for fun). I would ask who goes inside the school bus so that the child could say "me!"
I would ask the child to pick out the three items used for writing and marking. We would see if those items were small enough to go down the old lady's throat, which they are. Then I would let the child make shapes with the pen and chalk to experience the different ways writing with these feels and sounds; and would let the child poke holes in a paper with the stylus to experience that form of writing.
I would ask the child what place all of these items are related to, giving multiple choices such as a restaurant, school, or home. After the child chooses school, we would compare the objects with similar objects in the classroom. The child would find other books, writing implements, folders, and so on. We would see if the child owned similar items, such as their backpack. This would help show that items can feel and look somewhat different but still be the same thing or serve the same function, helping with the concept of generalization.
Last, I would let the child cut loose with the story box, asking them to make up their own story, using the objects in whatever way would help it come alive for them and me. I would give any needed assists.
Picture Communication Symbols for Story Box
Questions to Accompany the Picture Communication Symbols
- Which items can be used for writing or marking?
- Which items are made of paper and could be written on?
- Which is the one item that would never be found inside the school building?
- Which items are similar to things you own?
- Which item is mentioned first in the story, and which is mentioned last?
- Arrange the items in the order in which they appear in the story.
- Which item do you like the best, and why?
- Can you match these pictures with the items in the story box?
- Can you match these pictures with the tactile communication symbols?
- After looking carefully at the pictures, close your eyes and see which ones you can identify by tracing their outlines.
- How many items can you find in the classroom that are represented by these pictures?
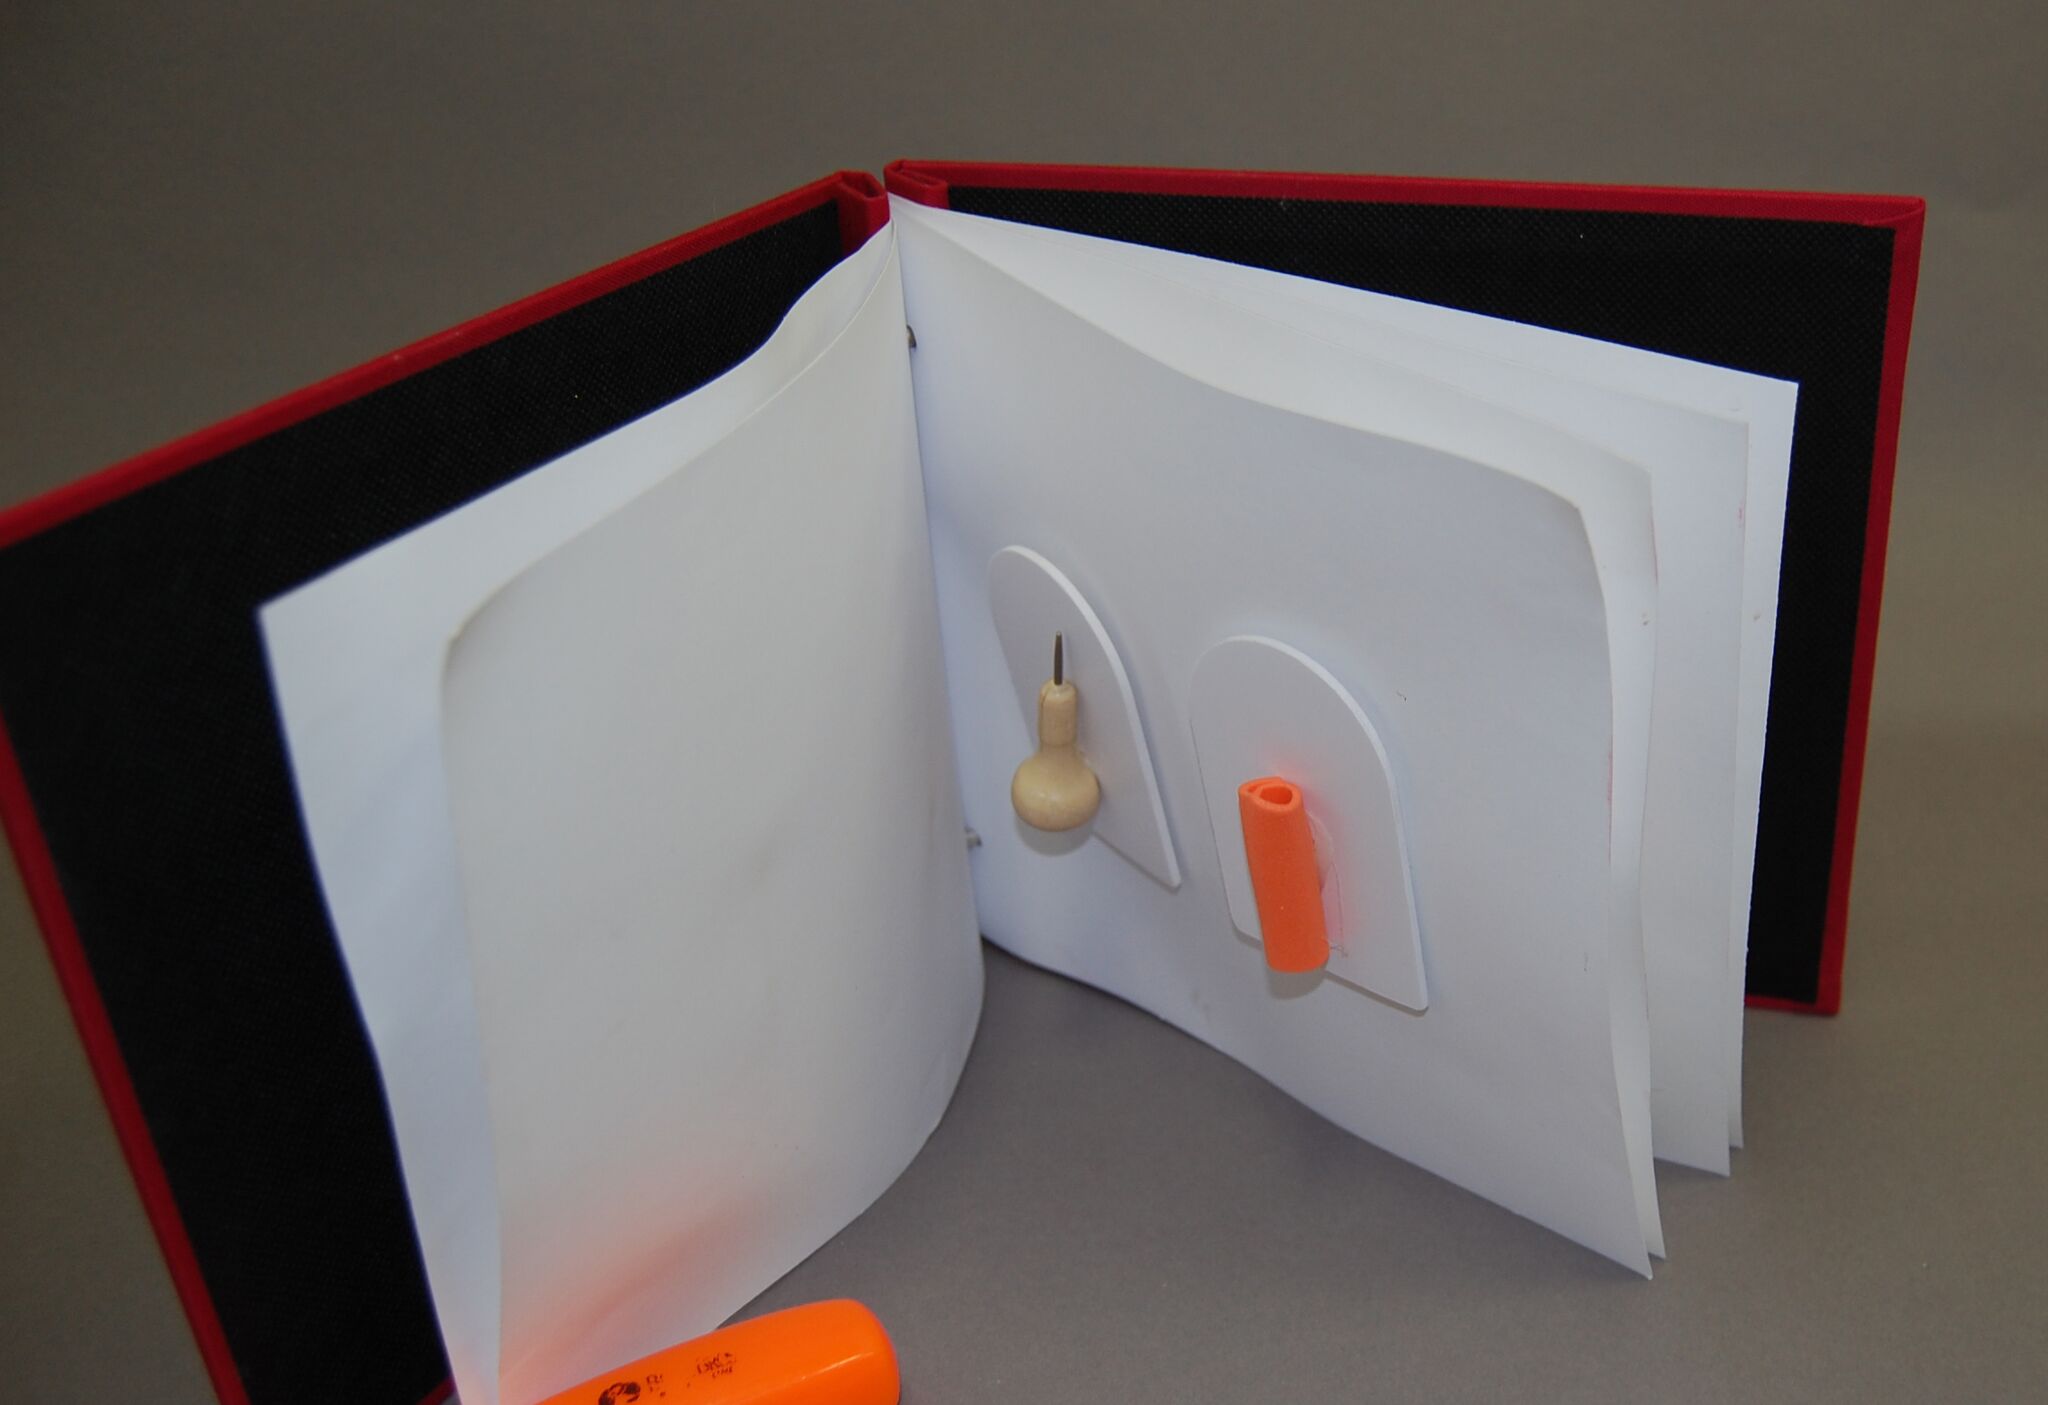
Tactile Communication Symbols
- Which symbol comes first in the story, which comes last, and which is one in the middle?
- Which is the only symbol that represents a person?
- Which symbols are parts of a whole?
- Which symbols feel like small versions of the real items?
- What are the differences between the symbols representing the book and the folder?
- Group together the three symbols of things used for writing or marking.
- Match each symbol with the item it represents in the story box.
- Match each symbol with an object in the classroom. These can be looser matches, such as pairing the old lady's hair with any student or teacher with hair, the pencil case with any small container, the wheel with any toy vehicle.
- Which is your favorite symbol, and why?
- With assistance, choose an item you love and pick the symbol that best represents it. (For instance, a child could choose a hat, then the cap for the pen.


Talking Book Project