Braille Gloves

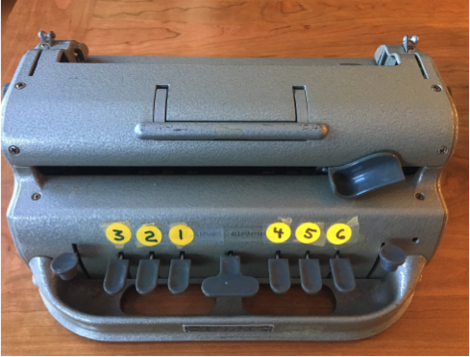
Like many teachers of students with visual impairments/blindness, I often familiarize sighted people with braille. This most often means introductions to family members of my braille students and to sighted classmates in their inclusion classes. I bring my braillewriter and show my audience the six keys for dots one through six. (I have already marked these numbers on my brailler. I put the labels above the keys rather than directly on them where correctly placed fingers cover them.)

As we all do, I demonstrate how we press dot one with our “dot one finger,” dot two with our “dot two finger", etc. Then I have them try writing some letters of the alphabet and their name or something else meaningful.
This is when they sometimes need a little more support, especially if they are classmates in Kindergarten or first grade. Which finger is my dot one finger? Which is for dot two?
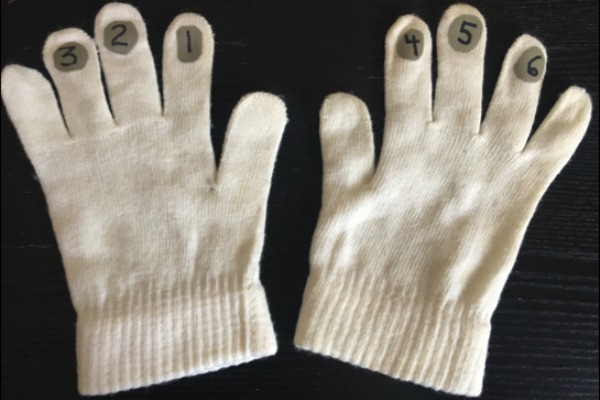
I sometimes handle any confusion here with my “braille gloves.” These are simply gloves with number “1” written on the back of the left hand index finger, number “2” on the second finger, etc. This visual aid usually makes the alignment of fingers-with-brailler-keys clear. It also appeals to people with strong visual memories, and it adds a little more fun to the process.
I made my gloves in just 4 or 5 minutes and a few dollars. I bought cheap gloves and some iron-on patch fabric. I cut 6 circles from the patch, wrote my numbers on them with permanent marker, and ironed them onto the fingers on the back of the gloves.
This is such a simple little idea that I hesitated to submit it to Paths to Literacy. But whenever I show colleagues, they like my braille gloves and often copy them. So I thought I’d pass on my idea: just a quick and easy tool for our braille gigs.


Comments
Love love this idea!! I've