Block Braille
Submitted by Grace Gundel on Jan 29, 2016

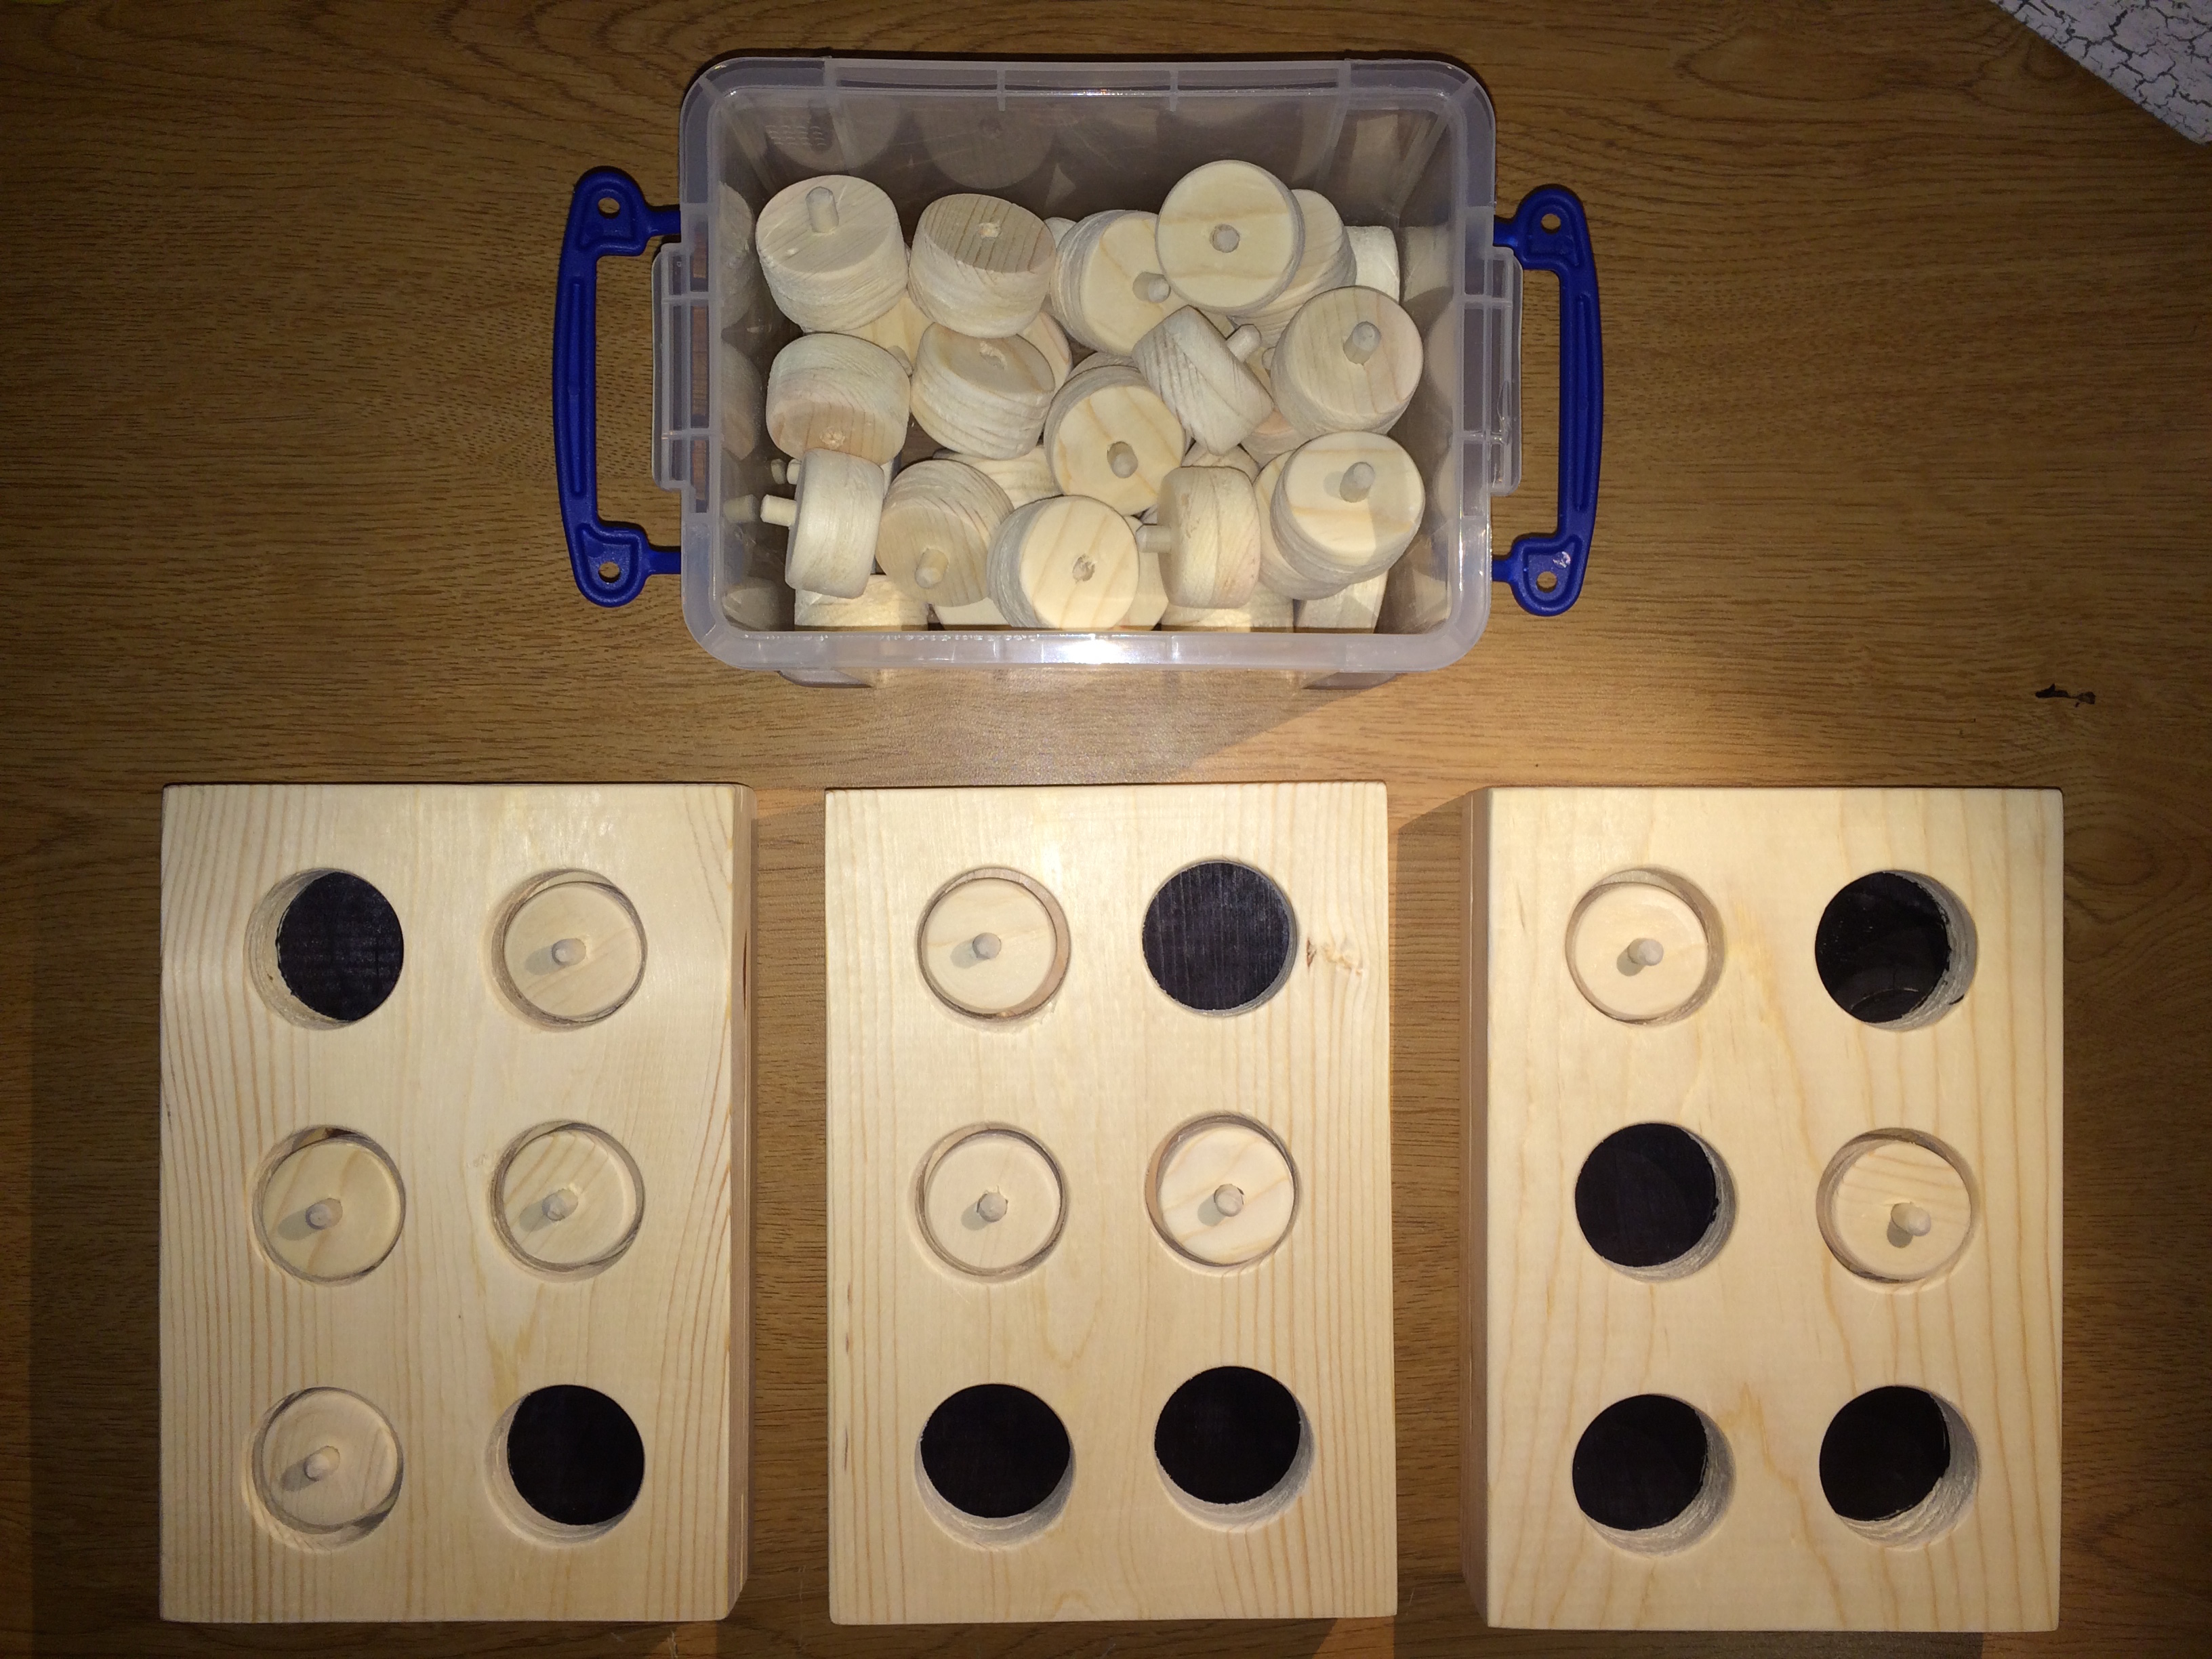
The Block Braille Cells will help students enhance their braille literacy by practicing the creation and deconstruction of the different letters of the alphabet. This activity will ultimately support the students' reading accuracy. This is a unique braille cell representation that the teacher can use with a student to make their understanding of alphabet letters concrete.
Materials:
- Wooden braille cell(s) (this depends if you are working on letters or whole words with your student)
- Removable pieces (as needed)
Procedure:
- Familiarize the student with the materials.
- The teacher should name a letter and have the student try and create it using the removable pieces. As the student progresses into Grade 2 braille, the use of wooden braille cells may increase.
- The student can check and compare their answer to a brailled alphabet sheet.
Variations:
The contrast at the bottom of the braille cells and the dowel rods sticking above the removable pieces makes this activity appropriate for all types of learners in the classroom.
How to make the Block Braille Cells:
- Saw 1 six-foot board into 7 equal parts (10 inches each).
- Mark six holes in accordance with the braille cell (approx. 1 inch per hole).
- Using a 1 inch circle drill bit, saw the previously marked holes and keep the remaining pieces. Repeat for all 7 braille block cells.
- After the holes are created, saw a second six-foot board into 7 equal parts.
- Line them up evenly. Nail the pre-cut cells to the solid block of wood.
- Sand as needed.
- When the holes are cut into the cells and the removable pieces are created, there will be a hole in the middle of each piece.
- Cut 42 one-inch pieces of a dowel rod.
- Hammer these dowel rod pieces into the holes of the removable cell pieces, but not completely. They should stick out high enough to make removal from the Braille Block easy. Sand as needed.
- Color the bottom of the braille cells black to create contrast.

