O & M Staff Resource Notebook
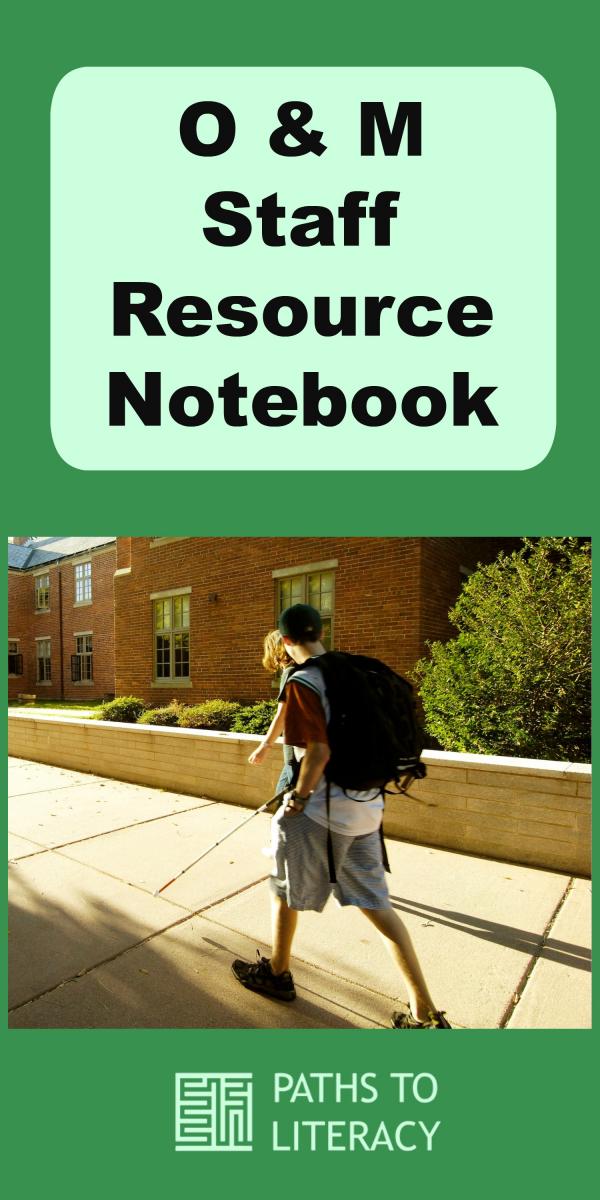
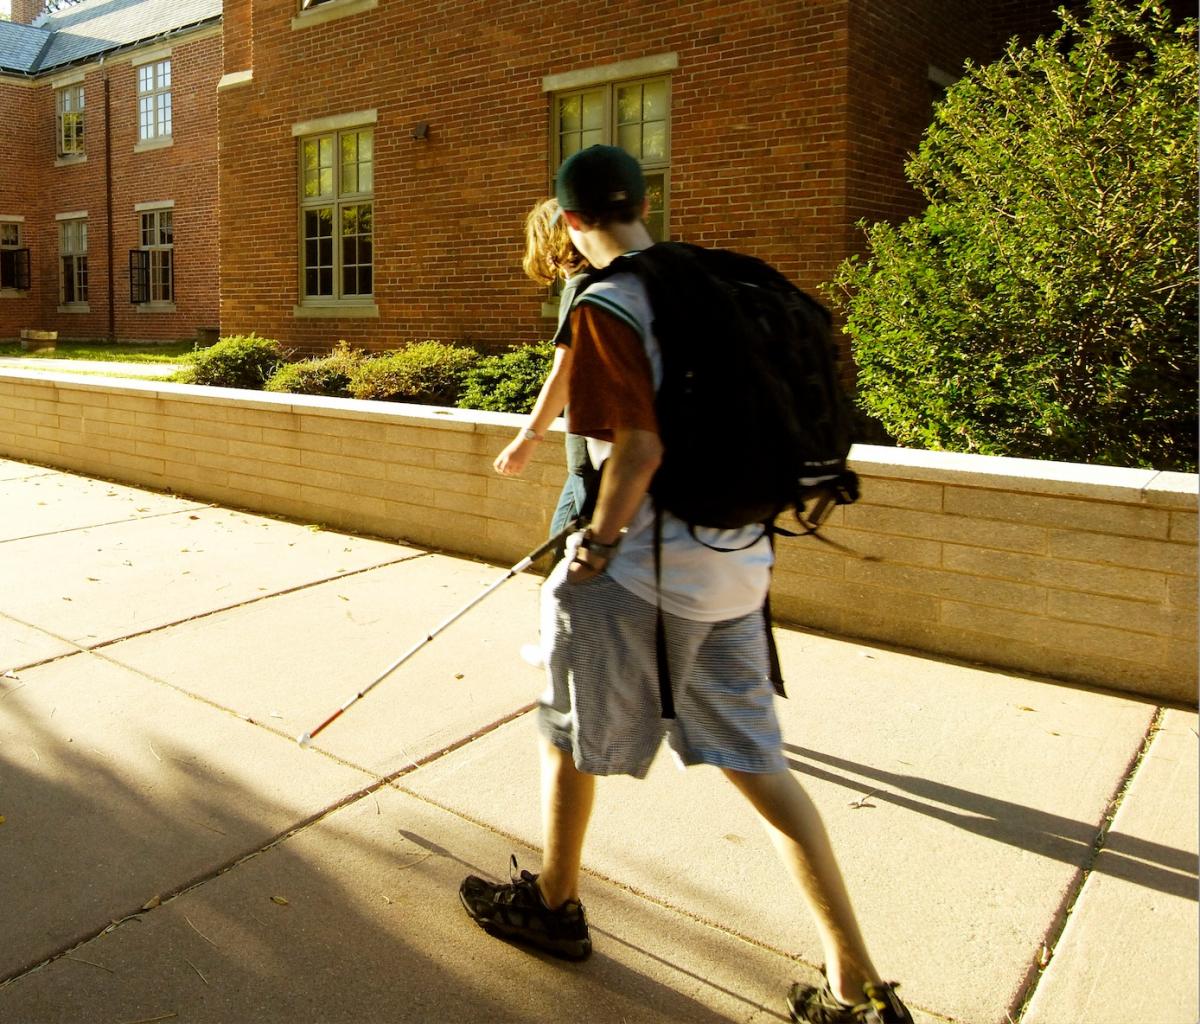 This notebook is a compilation of resources that can be used to share information about Orientation and Mobility with a student's team. I download and print all of this information and share with staff and parents, depending on the student's needs. I have gotten great responses from staff and find that by providing printed information for them in binders, they are more equipped to work with my students! Many of the para staff report that they take the information home to read. The more equipped that they are, the better my students perform.
Many thanks to Vision Aware, the National Center on DeafBlindness and Carmen Willings for permission to share information from their sites!
Table of Contents:
- Strategies When Working in the Classroom with Students Who Are Vision Impaired
- Long Cane Information
- Human/Sighted Guide Techniques
- Hand Trailing Technique
- Upper and Lower Body Techniques
- O & M Related Concepts to Teach
- Braille Information
- Technology
A. Strategies When Working in the Classroom with Students Who Are Vision Impaired
- Have the same expectations as the ones you have for other kids his/her age.
- When greeting your visually impaired student, say his/her name and your name so she/she knows you are talking to him/her and WHO is talking to him/her. “Hi (student), this is Mrs. Freeman, how are you?”
- Avoid playing the guessing game by not saying, “Hi, do you know who this is? Do you recognize my voice?
- When talking to another student, say the student’s name so that your visually impaired student gets familiarized with the students in his/her class and so that he/she knows whom you are talking to. It is very difficult to determine socially whom a person is talking to when vision is limited.
- During circle time or any other group activity, let him/her sit close to you so she/she can have as many hand-on activities as possible. For instance if you are talking about shapes during circle time you could just stretch your hand out to hand the student a square so that he/she knows what it feels like. If your visually impaired student has any vision you could also allow him/her to view the book or picture up close while describing what you see during the circle time activity.
- If you need to touch your student, warn him/her first. For instance say, “Hi (student), this is Mrs. Freeman, I am going to hold your right hand.” He/she may not see you moving your hands to touch him/her and you may startle him/her if you don’t give the verbal warning first.
- Use descriptive words when giving directions. For example, do not say “Go over there” say: “Walk to you’re right and find the trash can. It is located next to the door where you enter and exit the room. ” You can also tap the item so he/she can locate the sound and walk towards it.
- We always tell our vision-impaired students that their nose knows the answer. You can always tell him/her to turn their nose towards a particular sound or where they think the object is located and walk in that direction. If you want the child to face you during circle time you can say, “(Student) turn your nose towards my voice. Now align your body with your nose and you will be facing me.”
- If you or your students have a question for your vision-impaired student and he/she is with an adult, please direct your question to the vision-impaired child and not to the adult.
- Instead of doing hand over hand first, try giving him/her specific verbal directions.
- Describe the activity you are doing and materials he/she is using. For example, if you are doing a painting lesson you might say, “let’s all come to the bean shaped table near the “B” wall. We are going to do a painting lesson. Today we are going to make a rainbow. A rainbow has many colors. We will talk about the colors after you get to the table. Let’s all feel what we are going to use to make the rainbow. What colors are used in a rainbow? Discuss colors. What foods do we eat that are red? What do we think the color red tastes like? Possibly strawberries, strawberries are a red fruit. Does anybody like strawberries? Let’s feel the paintbrushes we will use to make the rainbow. We are going to use paint pallets to dip our paintbrushes in. What shape is the paint pallet? How many colors are in the paint pallet. Let’s say the colors from left to right. Red, purple, green and blue. We are going to paint on a paper plate today. This paper plate is white and smooth to the touch. It is shaped like a circle.”
- Do not be afraid of talking about colors. She/he may be able to see them and if not, she/he should be learning that bananas are yellow, the sky is blue, etc.
- Do not be afraid of using the word “see”. It is still appropriate to say “See you tomorrow” or “See how this is done”.
- Keep items in your room and his/her personal belongings in the same place as much as possible. If you need to change furniture or her things just let your visually impaired student know.
- When working with toys do not say “Here (Student) this is rabbit”, say “(Student) this is a rabbit toy” and then describe the toy… it has two long ears like real rabbits do…etc.
- Talk about emotions. Facial expressions or body movements that she may not be able to see represent many of the emotions. For example if you smile, I can tell you are happy but he/she may not see that, so you need to say “(Student) I am smiling because I feel happy.” Talk about the feelings to your visually impaired student so that he/she will know how other students may be feeling.
- If you write something on the board, say it as you write it.
- Verbalize words like “yes” or “no”. Do not just gesture. Visually impaired students often do not see gestures.
- Encourage eye contact. “Nose towards the voice.”
- If you are not sure if she can do something, give her the opportunity to try. You will be surprised at how many things he/she is capable of doing independently or with very little assistance.
B. Preparing Future Graduates Who Happen to Be Blind
C. Long Cane Information
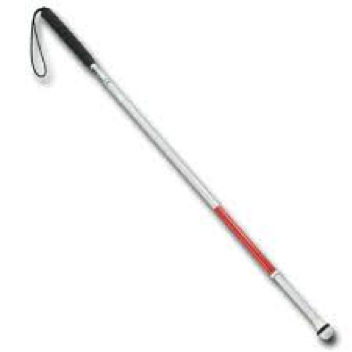
Parts of a Cane
- Tip
- Cane shaft
- Grip
- Joint
D. Human/Sighted Guide Techniques
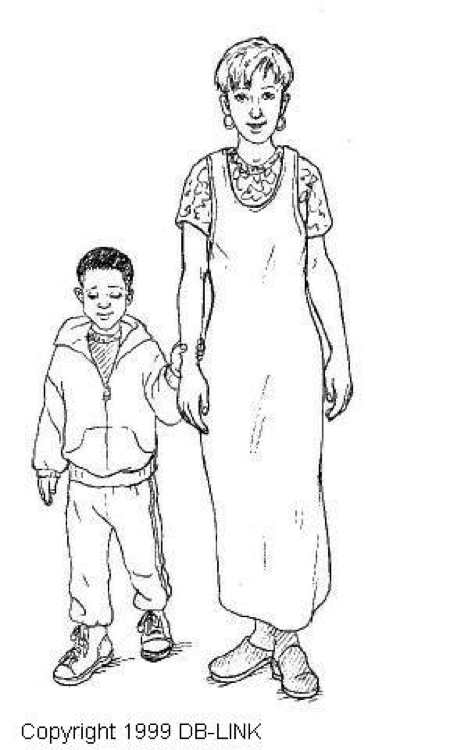
Human Guide Skills for the Younger Child
E. Hand Trailing Technique
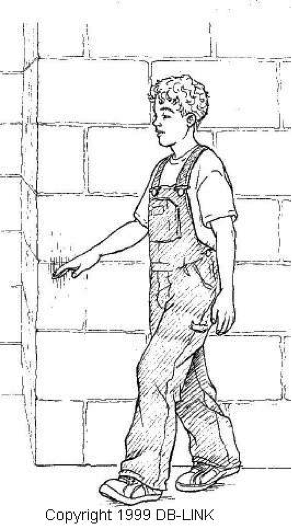
The Trailing Technique
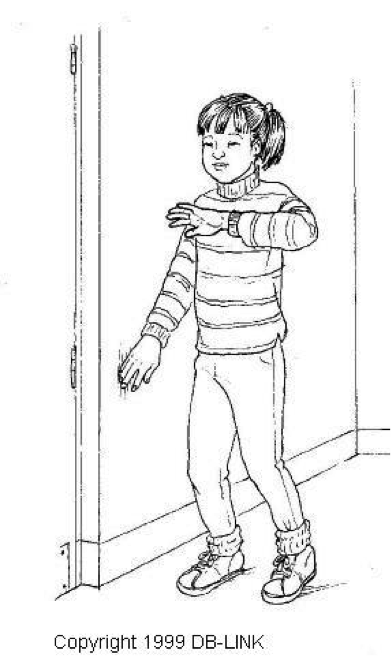
The Trailing Technique can help you locate a door, walk in a straight line, or detect the position of objects in front of you on the same side of your body as your extended arm. This technique can provide you with useful information about everyday objects, obstacles, and potential hazards that you may encounter as you move about your home. It can also provide you with a feeling of security while you walk, by allowing you to remain in contact with walls, countertops, desks, tables, or other types of stationary surfaces. It's important to remember that this technique will not warn you about approaching drop-offs, such as steps and stairs. For maximum protection, you should use the trailing technique in combination with either the upper or lower body protective technique, depending upon your needs in a particular environment.
-- Reprinted from Hand Trailing Technique with permission from Vision Aware; Leer este artículo en español: Usar la técnica de rastreo.
Illustrations from National Center on Deaf-Blindness
The technique:
- Begin along a straight stretch of wall in an uncluttered area. Stand with the side of your body about 6 inches from the wall.
- Extend your hand in front of you at approximately hip level and angled downward toward the floor, about 12 inches from your body.
- The back of your hand should be in contact with the wall, with your fingers slightly cupped toward your palm.
- This will prevent you from injuring your fingers if they make contact with an object. Your fingers will also act as "bumpers" to warn you about objects that you may encounter.
- Walk forward slowly while holding your arm in this position, keeping the backs of your fingers, especially the knuckles of your ring and "pinky" fingers, in contact with the wall.
- Make sure that the back of your hand is always in contact with a surface while you are moving.
- When you make contact with or locate an object, take a few moments to examine and identify it.
- If you come to a doorway, walk across the opening and resume trailing on the other side.
- For maximum protection when crossing the door opening, it is recommended that you use either the Upper Body Protective Technique or Lower Body Protective Technique, depending upon the particular environment.
- Initially, you may be able to hold this position for only a minute or two, but with repeated practice you will be able to maintain this position for longer periods of time.
-- Reprinted with permission from Vision Aware
F. Upper and Lower Body Techniques
Upper Body Protective Technique
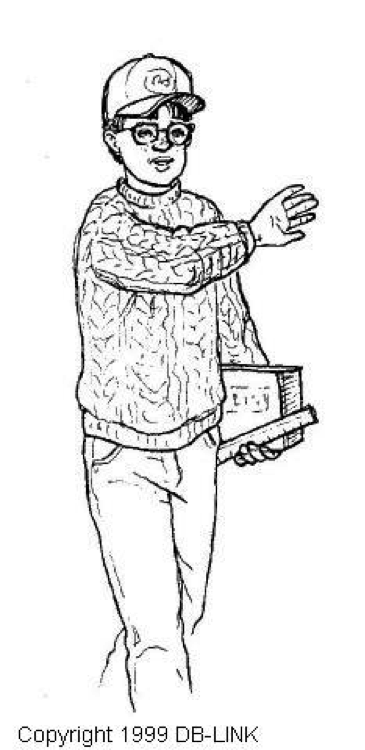
If you learn to use the following Upper Body Protective Technique correctly, your forearm will act as a "bumper" to protect your head and the upper part of your body from hanging plants, open cupboard doors, and room doors that are partially ajar. You can also use this technique when bending down to pick up objects or when checking a chair seat before sitting down.Even if you have some usable vision and think you are safe, don't take the risk--never, bend over without using this safety technique.
It's important to remember that this technique will only partially protect your shoulder and chest area, and will not protect you below the waist or warn you about approaching drop-offs, such as steps and stairs. For maximum protection, you should use a combination of upper and lower body protective techniques and/or a long white cane.
The Technique:
- Raise your stronger arm to shoulder height and extend it out in front of your body, as if you were pointing straight ahead.
- Bend your arm so that your forearm is across your chest, and touch your opposite shoulder with your fingertips.
- Move your hand approximately 10-12 inches away from your shoulder.
- You can estimate this distance by visualizing a shoe box or ruler placed lengthwise between your shoulder and your hand.
- Curl your fingers, spread them slightly apart, and keep your wrist straight as you turn your palm outward so that it faces away from your body.
- Keep your elbow chest high while you raise the forearm diagonally across the body until your hand is about ten inches in front of your face.
- Turn your palm outward with your fingers pointing at a slight angle back toward your face to protect them from injury and allow the forearm to serve as a buffer.
- It is important to maintain your hand and arm in this position, so that your upper body is partially protected.
- Initially, you may be able to hold this position for only a minute or two, but with repeated practice you will be able to maintain this position for longer periods of time. If your hand and arm are "floppy," they will not be as effective in protecting your head and upper body.
- If your arm becomes tired, you can switch and use your other arm, repeating the previous steps to maintain the correct positio
The Lower Body Protective Technique
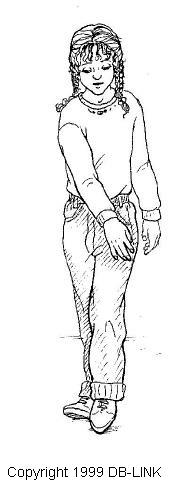 If you learn to use the following Lower Body Protective Technique correctly, your arm will act as a "bumper" to protect the lower part of your body from kitchen counters, table edges, nightstands, and the backs of chairs. It's important to remember that this technique will only partially protect your stomach or groin area, and it will not warn you about approaching drop-offs, such as steps, stairs, and ramps. For maximum protection, you should use a combination of upper and lower body protective techniques and/or a long white cane, guide dog, or human guide.
The Technique
- Position your stronger arm downward, as if you were pointing at the floor.
- Position your hand with your palm in front of and facing the opposite thigh, approximately 10-12 inches from your body.
- You can estimate this distance by visualizing a shoebox or ruler placed lengthwise between your thigh and your palm.
- Curl your fingers, spread them slightly apart, and keep your wrist straight with your palm facing your body so that the back of your hand will make contact with any object you encounter.
- Try to keep your fingers relaxed while walking.
- Keep maintaining your hand and arm in this position, so that your lower body is partially protected.
- Initially, you may be able to hold this position for only a minute or two, but with repeated practice you will be able to maintain this position for longer periods of time.
- If your arm becomes tired, you can switch and use your other arm, repeating the previous steps to maintain the correct position.
G. O & M Related Concepts to Teach
Reprinted with permission of Carmen Willings.
- A loss in the range and variety of experiences;
- A loss or the restriction in the ability to get around (which influences opportunities both for gaining access to experiences and for developing social relationship); and
- Loss of the control of the environment and the self in relation to it.
Students may also need guided exploration and explanations of what they are interacting with. Explanations provide the student with vocabulary associated with the experience, help the student make sense of what they are feeling and make connections to previous experiences. These experiences will help develop the students understanding of new concepts, develop their language, and motivate them to explore their environment which will subsequently lead to motor development.
To minimize or eliminate these restrictions, it is important to provide concrete and unifying experiences as well as to encourage the student to be a part of the actio" by "doing". When provided with concrete experiences, the student will experience many opportunities to develop concepts. Many of these concepts can be developed simply by actively participating in family and school routines. Other opportunities can be created that are fun and relevant for both students with visual impairments, but for sighted peers and siblings too. Both the Teacher of Students with Visual Impairments and the Orientation and Mobility Specialist will work with the student on building concepts.
Objects
(ex. chair, table, paper, book, etc.)
The best way to help children to identify and understand the difference between objects is to expose them to a wide variety of objects. Encourage the student to interact with the object and identify the characteristics of the object.
- Verbally label the objects, pointing out their similarities and differences. For example, what makes a chair a chair? A chair can be hard and a chair can be soft but the function of the chair is to provide the user with a place to sit.
- Challenge the student to classify other items with similar characteristics. Provide literacy opportunities by pairing the objects with print/braille whenever possible in addition to the verbal labels.
Shapes
Children need to first learn about three dimensional objects and then once the student has an understanding of 3D objects, they can begin to transfer the skill to two dimensional objects. All students will need this understanding, but it is imperative for future braille readers to have this foundational understanding in order to prepare them for identifying tactual graphics which is more abstract.
Suggestions for instruction:
- Shape inset puzzles, shape sorter toys and exploration of 3D shape models are a natural way to introduce shapes.
- As the student touches the shape, verbally label the shape for the student.
- Assist the student in tracing around the perimeter of the shape, pointing out the smooth edges or corners and sides. Incorporate literacy opportunities by placing the name of the shape on the object or puzzle piece and be sure to point out the print or braille word to the student.
- Locate and explore shapes in play as well as in the environment. Encourage the studen to search for and compare similarities and differences in shapes.
- Help the student trace the outside of objects and compare to shape models to help them make the connections (e.g., the box of crayons is the shape of a rectangle, the lunch tray is also a rectangle, etc.)
- Provide many opportunities with a variety of objects to help the child transfer their knowledge and understanding that shapes are all around them.
Once the student is able to identify 3D shapes, create 2D representations of the shape and encourage the student to match the 3D shape to the 2D shape as well as the 2D shape to a matching 2D shape.
Sizes
(ex. big, little, tall, short, thick, thin, wide, narrow, etc.)
Suggestions for instruction:
- Practice learning about sizes by discussing sizes of objects and materials in the environment.
- Provide the student with objects in a variety of sizes (ex. travel size items verses full size items) related to the classroom topic or related to an area of interest.
- Compare and contrast the size of the items. A classic story to practice size concepts is Goldilocks and the Three Bears.
- Once students can sort and match shapes, encourage them to place them in order from smallest to biggest, shortest to tallest, thin to thick, etc.
Textures
(ex. rough, smooth, bumpy, soft, hard, furry, sticky, fuzzy, slick etc.)
Suggestions for instruction:
- Provide students with many opportunities to explore a wide variety of materials with various textures.
- Tactile books can be obtained or created to compare textures.
- Provide a variety of clothes with different textures and compare and contrast them.
- Identify and sort a variety of textures.
Body Awareness
(ex. parts, functions & movements)
Suggestions for instruction:
- Families can practice body awareness with little children naturally during bath time and during dressing.
- In the classroom, a fun way for students to practice learning their body parts is by singing songs about body parts and movements.
Positions & Spatial Relationships
(ex. on, off, in, out, front, back, left, right, up, down, above, below, top, bottom, in front, behind, on top, underneath, next to, beside, through, middle, center, between, here, there, under, over, upside down, right side up, first, last, together, apart, forward, backward, sideways, straight, there, under, etc.)
According to Fazzi and Petersmeyer (Imagining the possibilities: Creative approaches to orientation and mobility instruction for persons who are visually impaired,AFB Press 2001), “development of spatial awareness helps students understand the placement, arrangement, and spacing of persons or things in relation to one another.” O&M specialists will play an important role in teaching spatial concepts to the student. Spatial awareness concepts apply not only to education, but relate directly to travel. Spatial concepts include body awareness and spatial awareness. As with other concepts, direct experiences will help the student learn the concept. Physical experiences will help lay the foundation for development. Once a student has learned the concepts using their own bodies, they can then develop concepts related to models and representations.
Suggestions for instruction:
- Take advantage of opportunities throughout the day to point out the position of materials/objects in the environment.
- Create games to encourage the students to place themselves or materials in relation to other items.
- Encourage the student to demonstrate the concepts on their own bodies, from the student's body to an object, and between two objects.
- Encourage activities that will develop the student's body concept such as large movement games that include rolling, crawling, walking backwards and sideways, jumping and other movement variations.
Suggested Materials
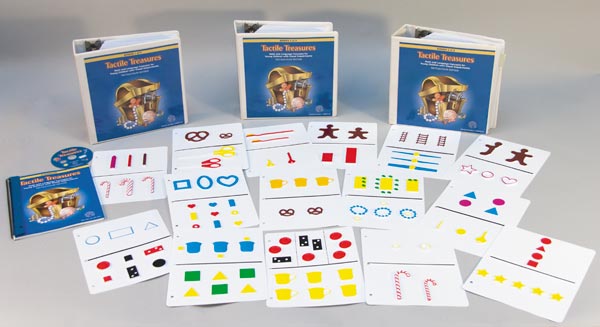 Tactile Treasures Kit, Tactile-Color Edition, available from APH, consists of tactile graphics of thermoformed real objects. This is another great tool for transitioning students from 3D objects to raised line drawings and tactile graphics.
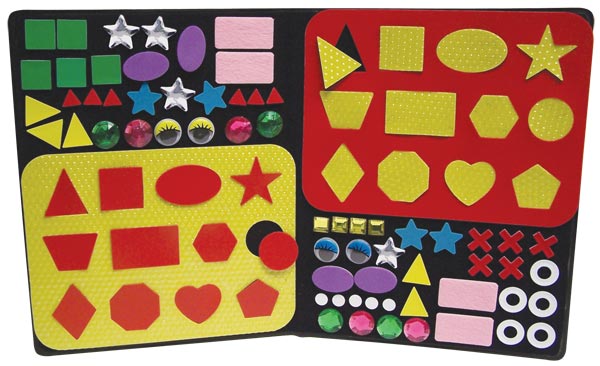
Picture Maker Geometric Textured Shapes, available from APH provides Velcro backed 2D shapes. This is a great transitional and versatile tool to use moving from 3D shapes toward tactual graphics.
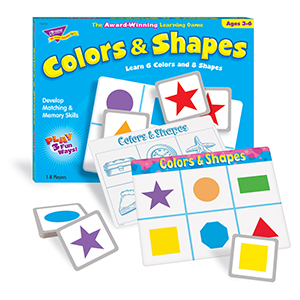 Colors and Shapes Lotto Game by Trend is a great shape matching game this is not only good for students with low vision, but can easily be adapted with the addition of textures and tactile graphics making materials in order to make it accessible to students who are blind!
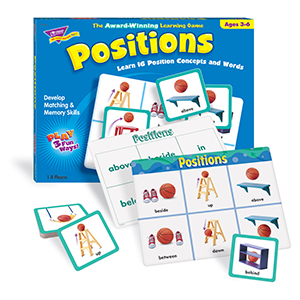 Positions Lotto Game by Trend is a great position photo matching game that is great for students with low vision who are able to visually discriminate pictures. I like the simple photos on an uncluttered surface!
H. Braille Information
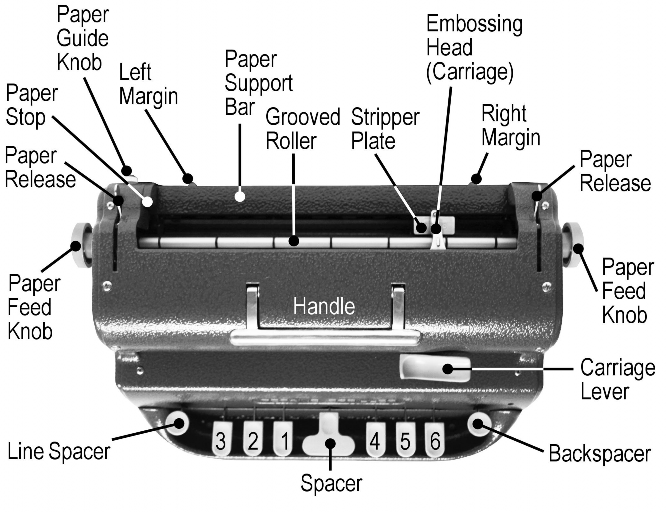
APH Picture Diagram
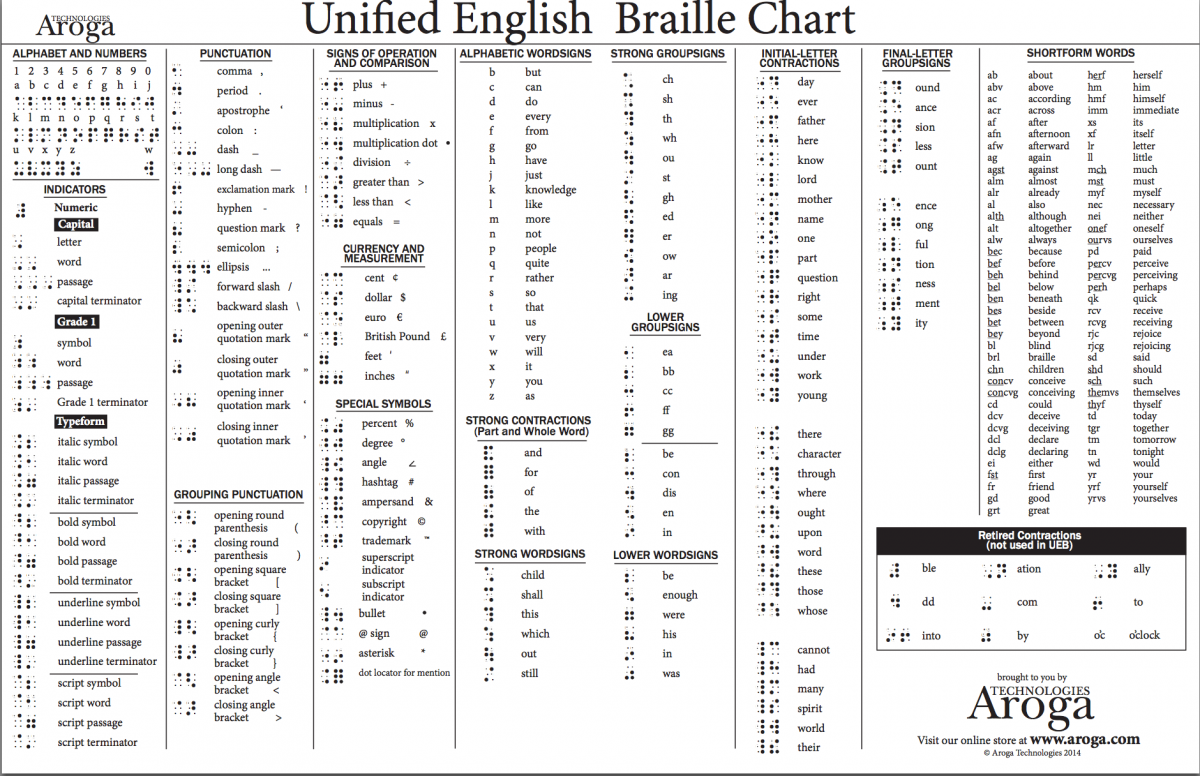
Unified English Braille Chart
I. Technology
Recommended Book to Purchase:
Tips from Apple:
- Shortcut key
- Voiceover commands and gestures by Apple
- Bluetooth keyboard when voiceover is on and commands to use
Recommended Apps:
